How To Assign Roles and Manage Permissions in Your Team
This document outlines the procedures for managing user access, roles, and permissions within OfficeSeries. This ensures that team members have the necessary access to fulfill their roles while protecting sensitive information and maintaining operational security.
Prerequisites
Before proceeding, ensure you have the following:
- Administrative rights.
- Knowledge of your organization's access control policies.
- A list of users or groups to manage, including their intended roles.
Managing Team Access, Assigning Roles, and Granting Permissions
Team Managers or similar roles can manage team access, assign roles, and grant permissions. The ability to modify team composition depends on your organizational role and permissions.
OfficeSeries equips Administrators with the necessary tools to:
- Control Access: Fine-tune who can view, modify, or interact with team resources.
- Assign Roles: Facilitate the addition or adjustment of roles for team members.
- Customize Permissions: Adapt permissions to meet both team and organizational requirements.
Regular review and updates of permissions are vital to align with the evolving roles and responsibilities within the team.
Understanding Roles and Permissions
Roles are pivotal in defining a user's permissions and actions within the team. For example, a "Team Manager" role might include capabilities such as adding or removing team members.
How to Grant User or Group Access to a Team
Assigning appropriate roles to users or groups is fundamental to ensuring secure and effective team collaboration. Administrators can define access levels and permissions to match each team member's role.
Steps in Assigning User Roles within a Team:
Log into OfficeSeries: Sign in with an administrative account.
Navigate to Teams: Select "Teams" from the main menu.
Select a Team: Choose the team you wish to manage.
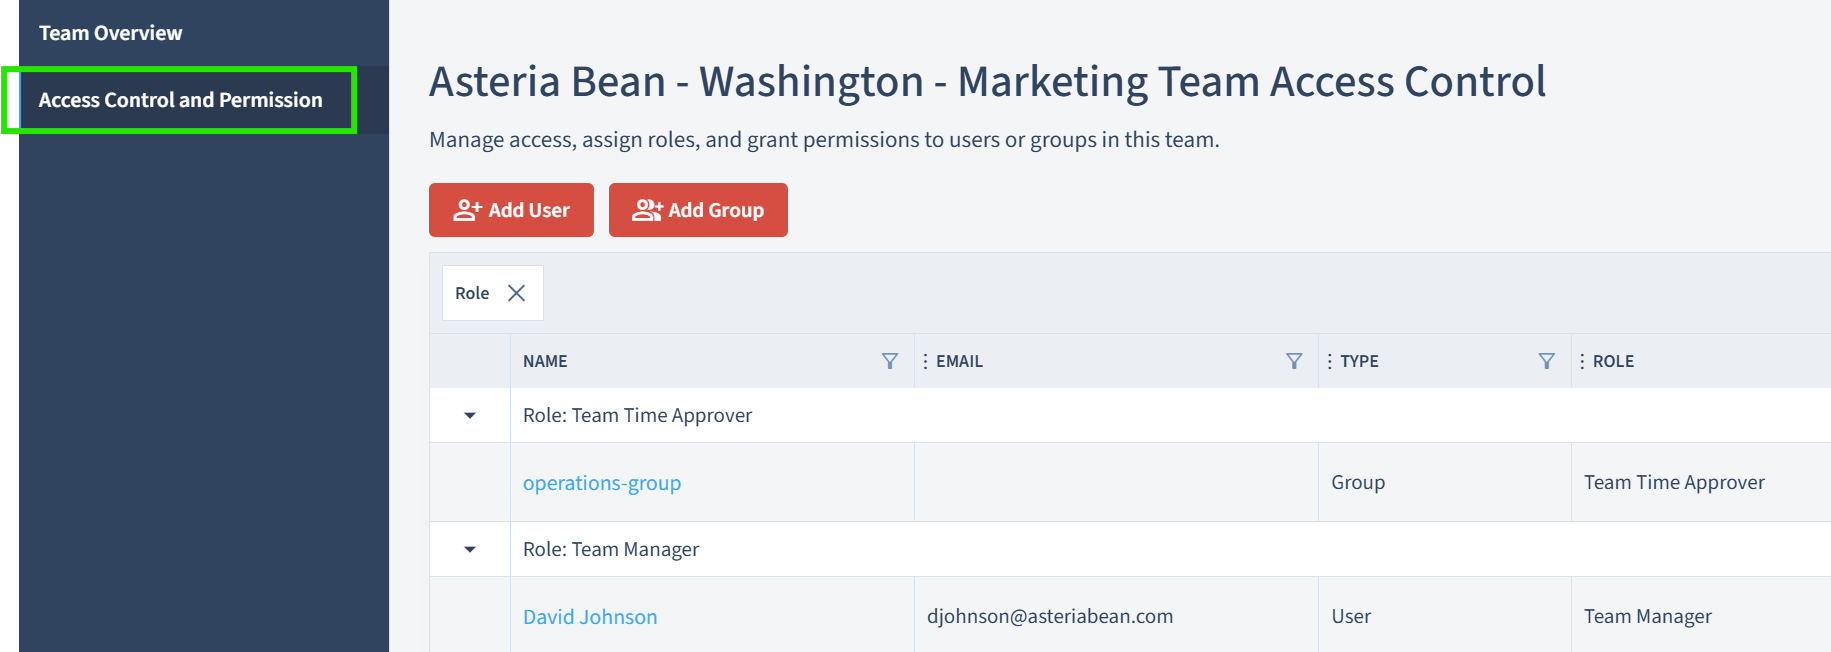
Access Permissions: Click on "Access Control and Team Permissions".

Add User or Group: Click "Add User" to assign roles to individual users, or "Add Group" for group assignments.
Select a Role: Choose the appropriate role for the user(s) or group(s) from the provided options.
Select User(s) or Group(s): Choose the user(s) or group(s) to assign the selected role. Multiple selections are allowed.
Review and Grant Permissions: Review the permissions for accuracy, then click "Grant Permissions" to apply.
Confirm and Review: Confirm the changes and review the updated roles and permissions for accuracy. Repeat as necessary for additional assignments.
How to Remove User or Group Access from a Team
Adjusting team composition by removing access to resources for certain members is essential for maintaining security and operational integrity.
Steps in Removing User Roles within a Team:
Log into OfficeSeries: Sign in with an administrative account.
Navigate to Teams: Select "Teams" from the main menu.
Select a Team: Choose the team you wish to modify.
Access Permissions: Click "Access Control and Team Permissions".
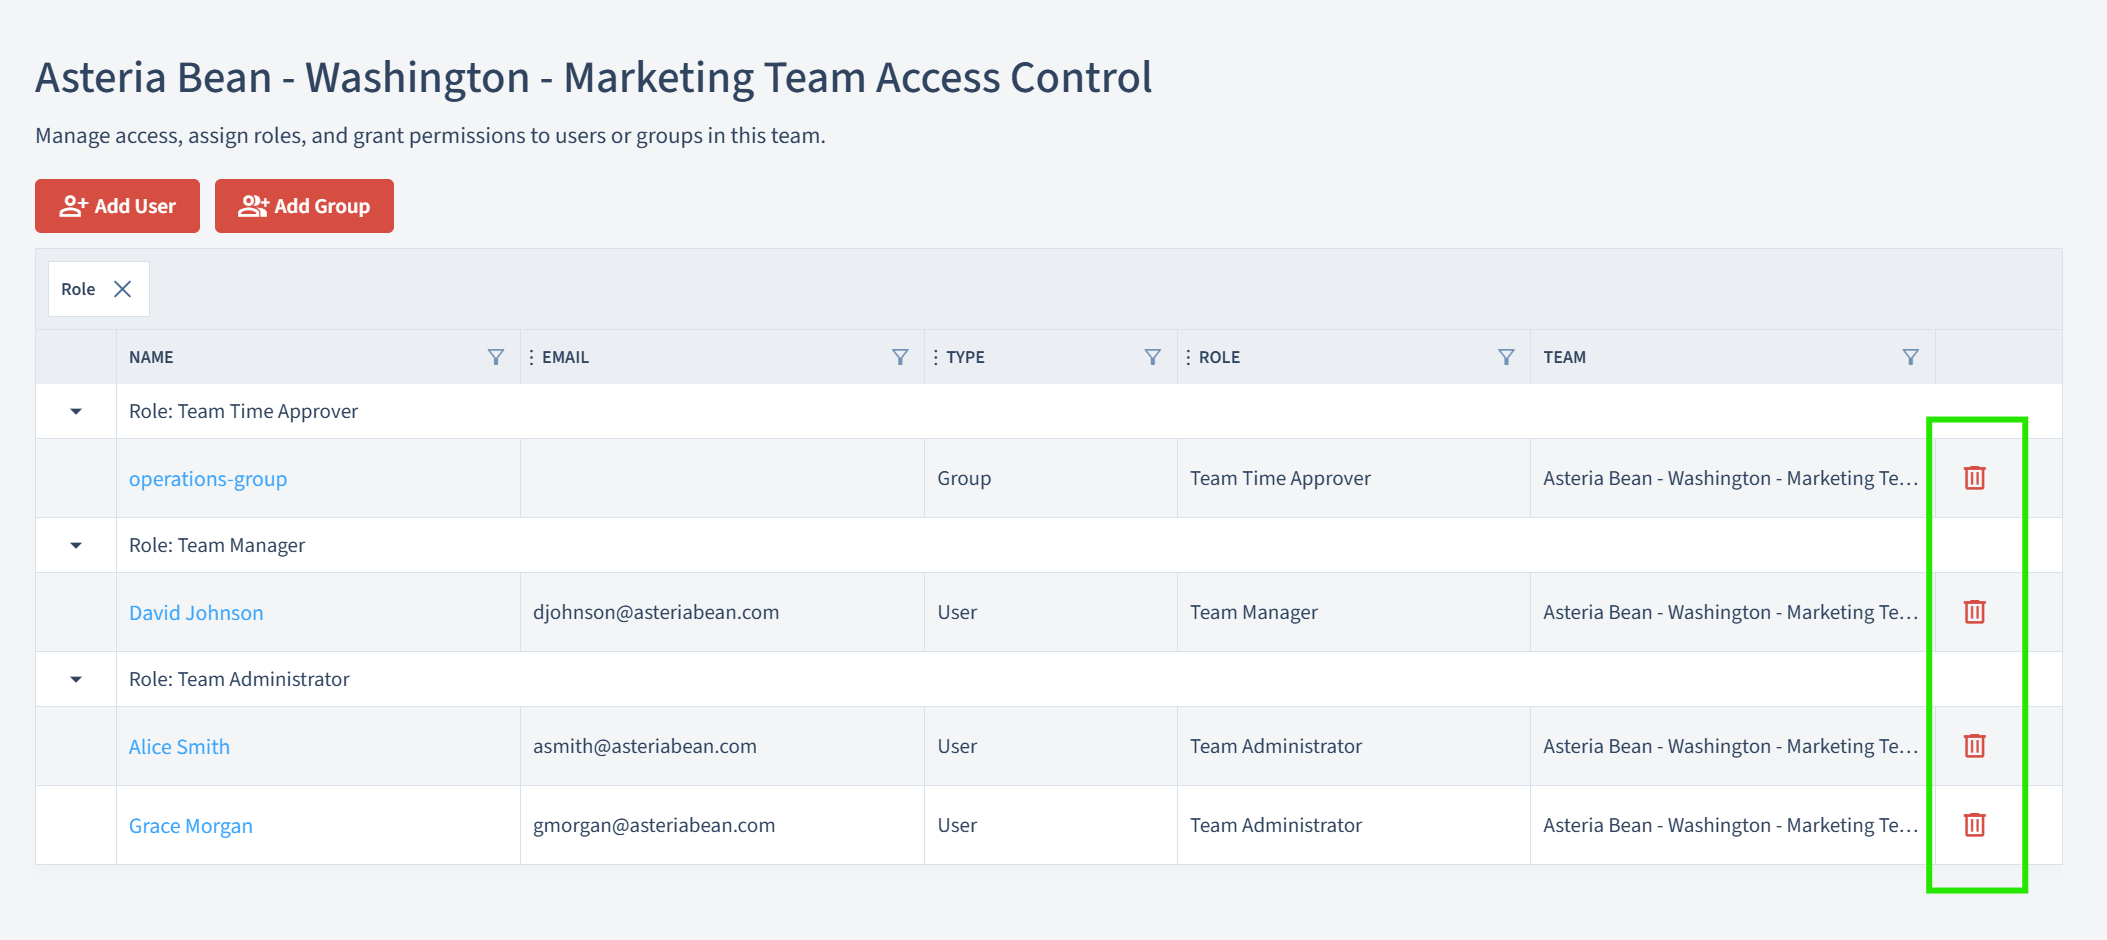
Find User or Group: Locate the user or group to remove. Use the search function for large teams.
Remove Role: Click the delete button or icon next to the user or group's name to remove their role.

Confirm Removal: Confirm the action when prompted.
Review Changes: Ensure the role removal has been correctly applied. Repeat for any additional removals.
Summary
Maintaining appropriate access and permissions is key to effective team management. Adherence to organizational access control policies is essential. This guide provides a framework for managing access, assigning roles, and granting permissions within OfficeSeries.