How to Sign Up for OfficeSeries
This guide will walk you through the process of signing up for an OfficeSeries account and subscription. Whether you're a small business, a large enterprise, or an individual professional, OfficeSeries provides a comprehensive solution for efficient time tracking, project management, and resource allocation. By signing up, you'll gain access to powerful tools that help streamline your workflow and enhance productivity. Let's get started!
A Step-by-Step Guide to Creating Your OfficeSeries Account and Subscription
Step 1: Navigate to the OfficeSeries website
The first step is to visit the OfficeSeries website where you can start the sign-up process.
- Open your preferred web browser (e.g., Chrome, Firefox, Edge).
- In the address bar, type
https://www.officeseries.comand press Enter. - Once the OfficeSeries homepage loads, look for the "Sign Up" button and click on it to begin the registration process.
Step 2: Tell us about yourself
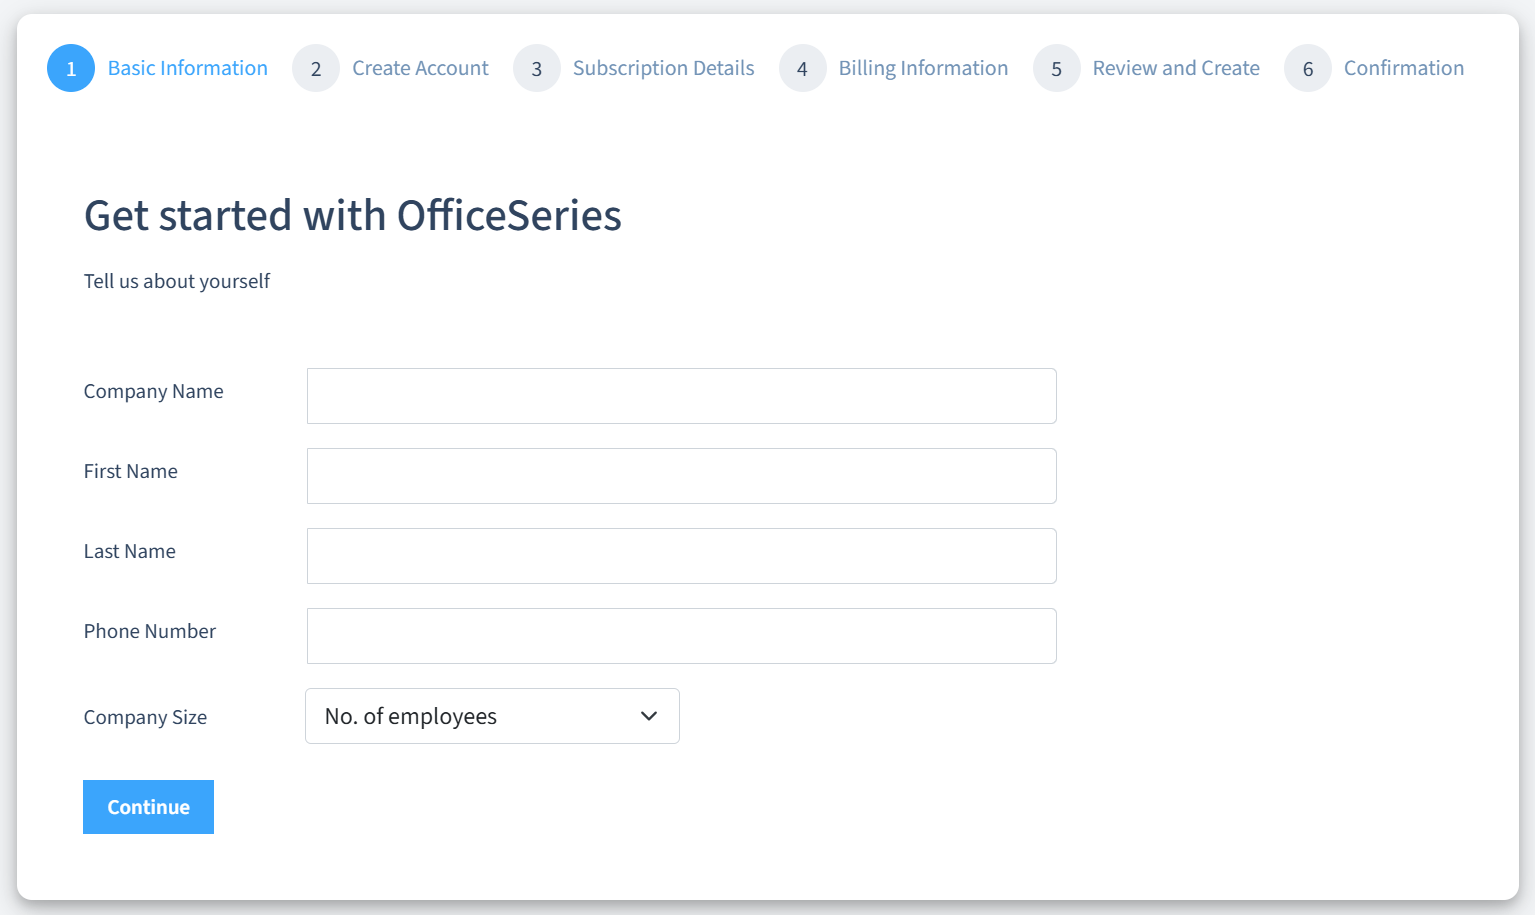
The second step is to provide some basic information about yourself and your company (see image below for reference). This will help us tailor our services to your needs and preferences.
- Enter your company name and the number of users you want to add to your subscription.
- Enter your first name, last name, phone number, and email address. Make sure to use a valid email address as this will be used for account verification and communication.
- Click "Continue" to proceed.
Step 3: Verify your email address
The third step is to verify your email address and create a new account. If you have an existing OfficeSeries account using the same email address, you can still use that exact email address to create a new account with OfficeSeries.
- Enter your email address.
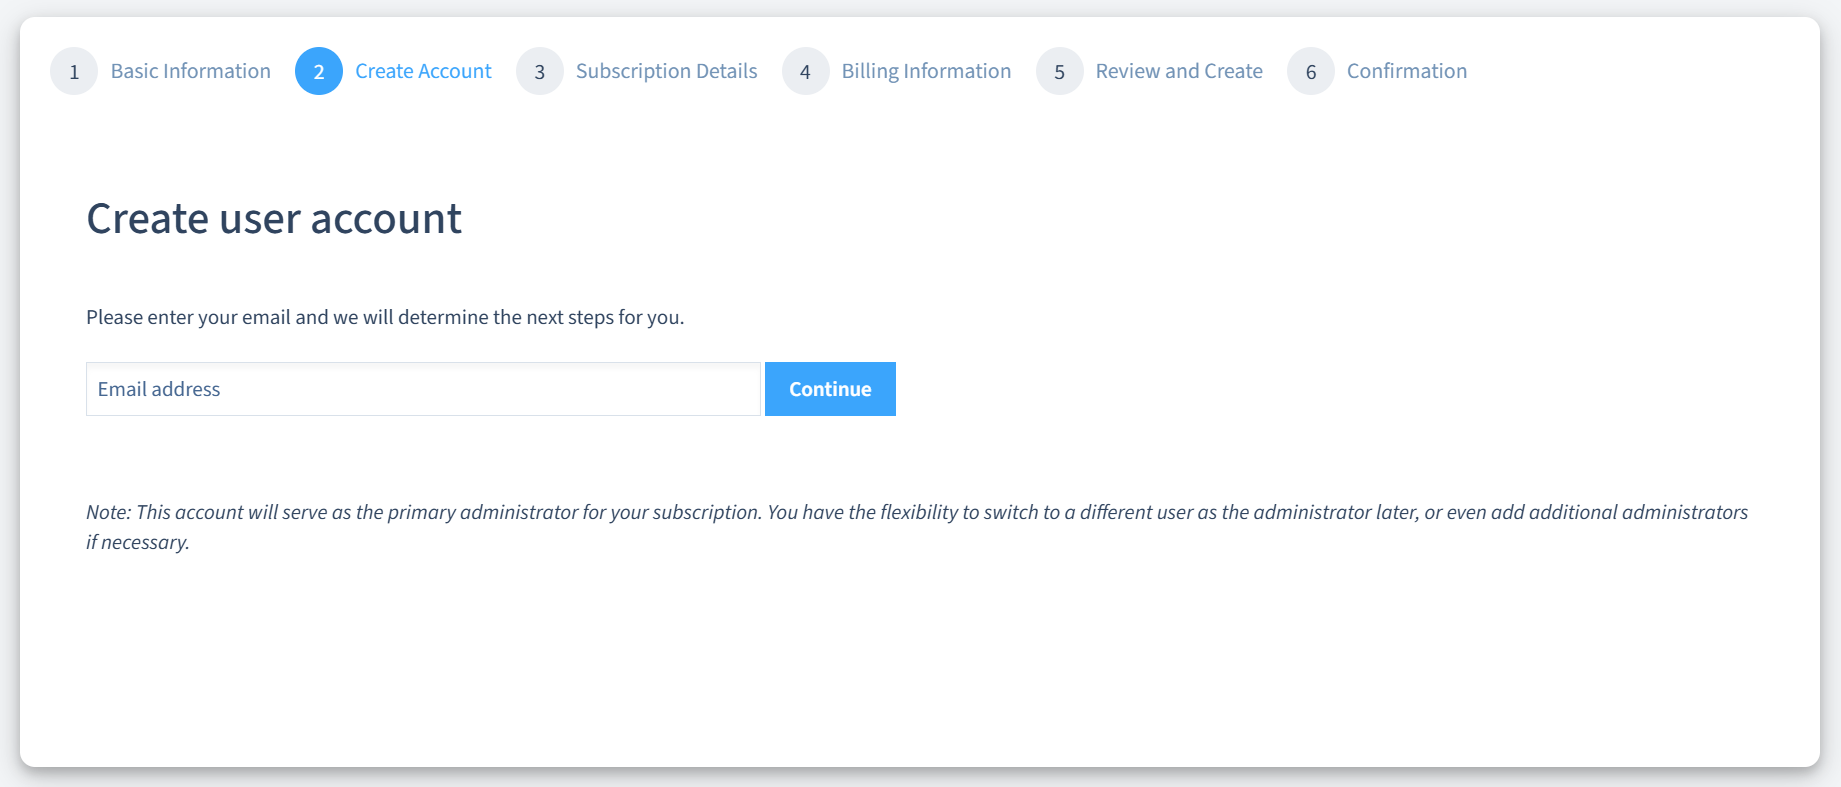
After selecting the "Continue" button, we will determine if you have an existing account with OfficeSeries.
If your email address is already associated with an OfficeSeries account, you will see a message that says "It looks like there is already an existing account with email [your email address]." You can choose one of the following options:
- Create a new account or tenant with the same email address: This will allow you to have multiple accounts or tenants under the same email address.
- Sign in to your current account: This will take you to the sign-in page where you can enter your password and access your existing account.
- Use a different email address to sign up: This will take you back to the previous step where you can enter a new email address and repeat the verification process.
Once you've decided on the appropriate action, click "Send Verification Code" to verify your email.
You will receive an email from OfficeSeries with a validation code. Check your inbox and copy the code. If you haven't received any email from OfficeSeries, refer to Troubleshooting steps below.
Enter the code in the text box on the OfficeSeries website and click on "Verify Code" to proceed. You can also resend the verification code if needed.
After the successful verification of your email, you will be prompted to enter your password and confirm it. Click "Continue" to proceed.
Step 4: Set up your OfficeSeries subscription
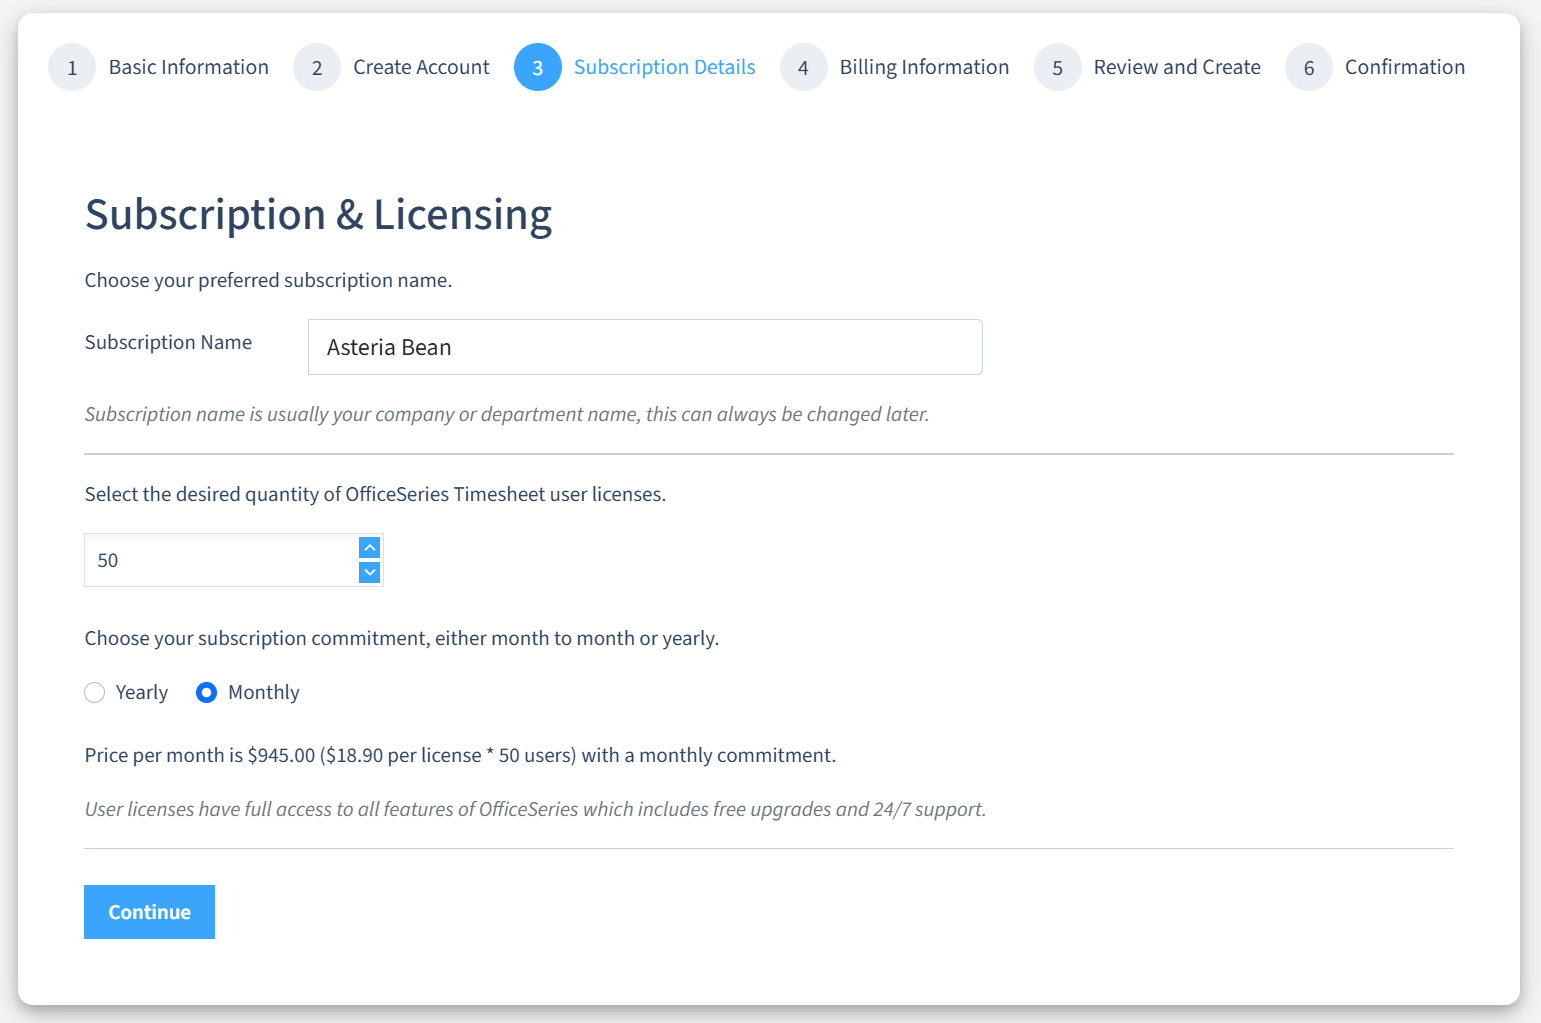
The fourth step is to set up your OfficeSeries subscription. You can review and edit the following information:
- Company name: This is the name of your organization that will appear on your subscription and invoices.
- Subscription name: This is the name of your subscription that will help you identify it among other subscriptions. By default, it is the same as your company name, but you can change it if you want.
- Number of licenses: This is the number of user licenses you want to add to your subscription. You can increase or decrease this number later.
- Preferred subscription type: You can choose between a yearly or a monthly subscription. The yearly subscription offers excellent value with a lower price per user per month and a one-year commitment. The monthly subscription provides flexibility with a month-to-month commitment.
- License inclusions: This is a summary of the features and benefits you will get from your subscription. You can see the full list of features by clicking on the link.
Click "Continue" to move to the next step. You can use the image below as a reference.
Step 5: Set up your billing details
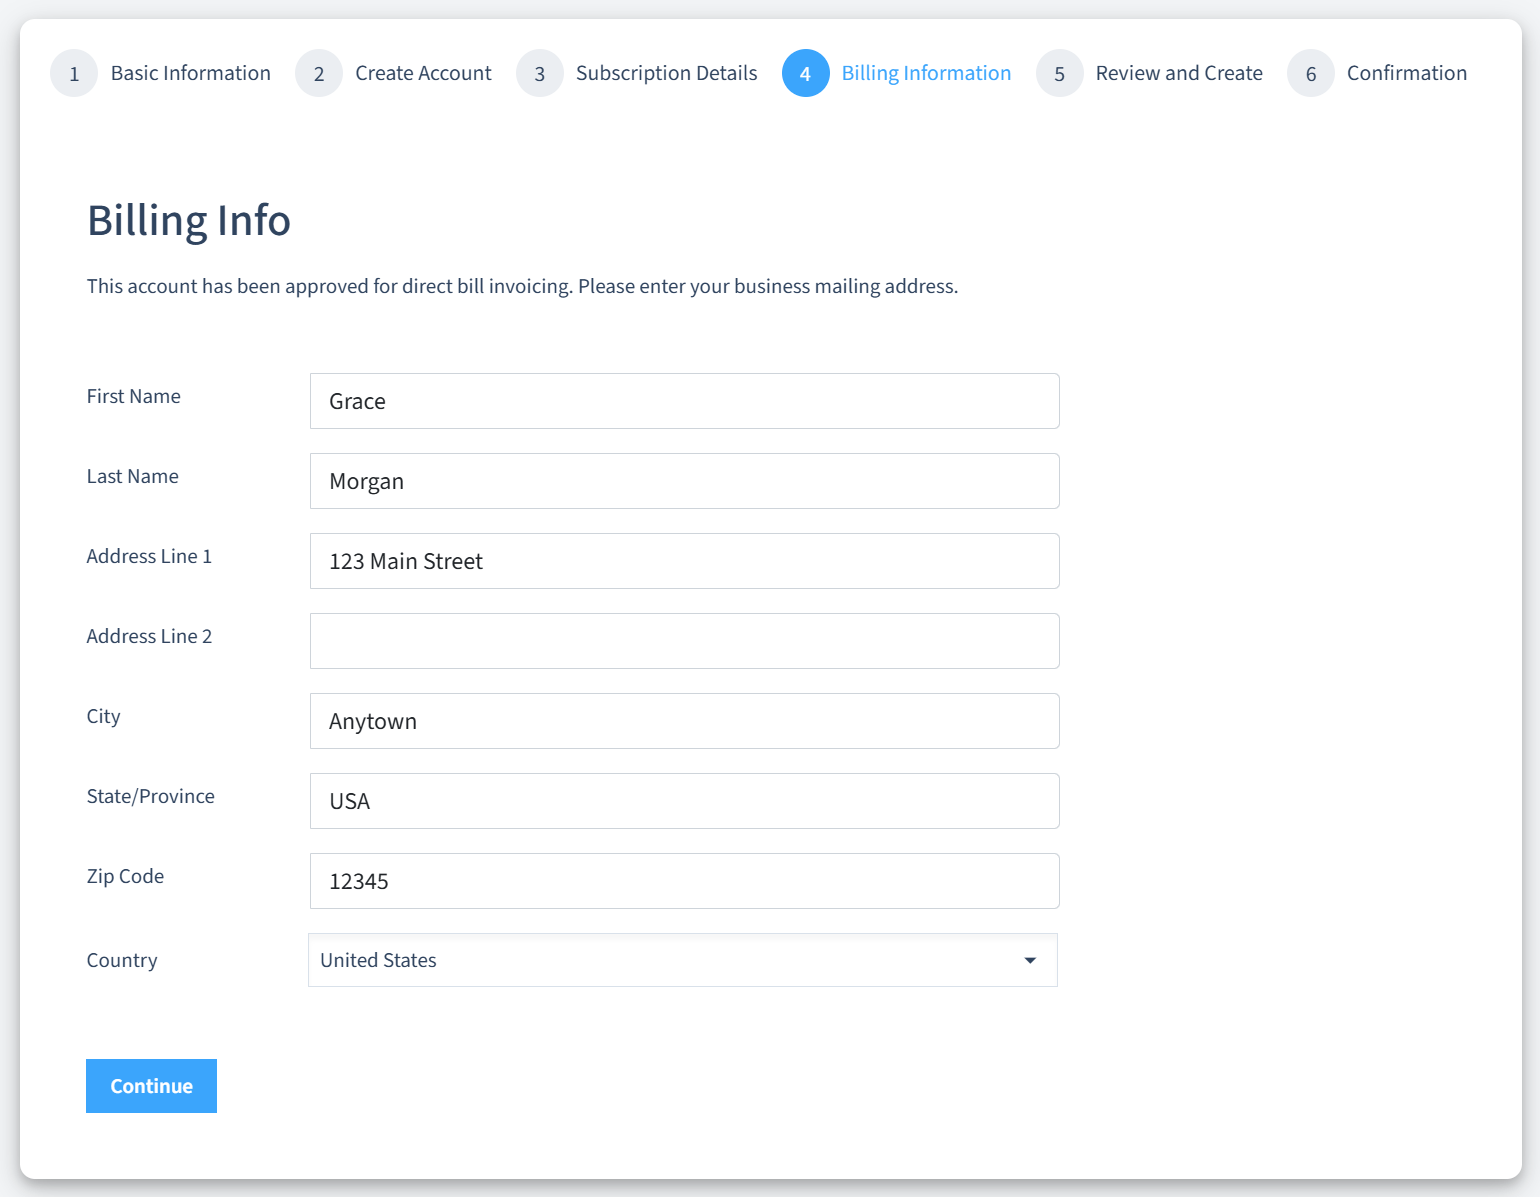
The fifth step is to set up your billing details. You will need to enter your billing address.
- Enter your billing address, including your first name, last name, address line 1, address line 2, city, state/province/region, zip/postal code, and country.
- Click "Continue" to proceed with reviewing and creating your subscription.
Step 6: Review details and create your subscription
The sixth step is to review your subscription details and create your subscription.
- Review all the information you have entered, including your company information, subscription information (e.g., number of licenses, subscription type, et al.), and billing information.
- Ensure that all details are correct. Click "Edit" to make any necessary changes.
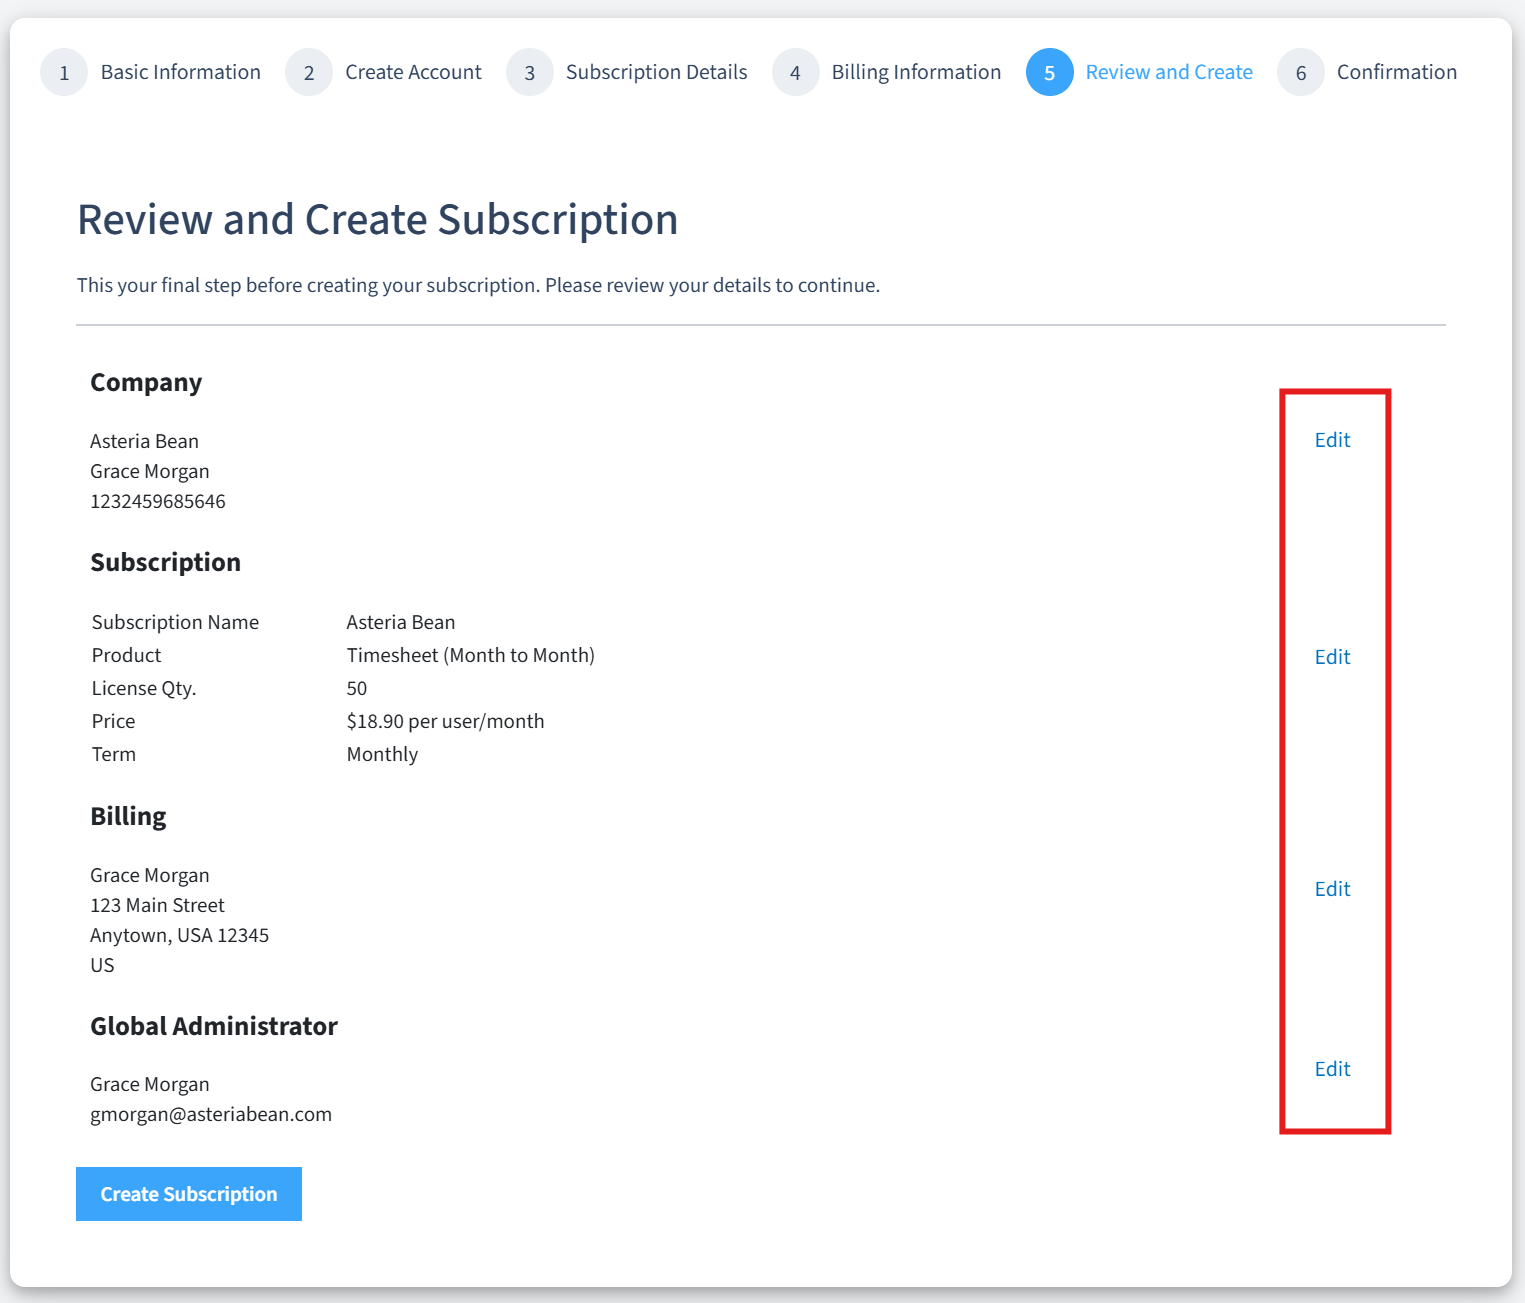
- Once you are satisfied with the information, click the "Create Subscription" button to finalize your new OfficeSeries account.
Step 7: Confirmation page
Upon successful completion of the sign-up process, you will be directed to a confirmation page that acknowledges the creation of your OfficeSeries account and subscription.
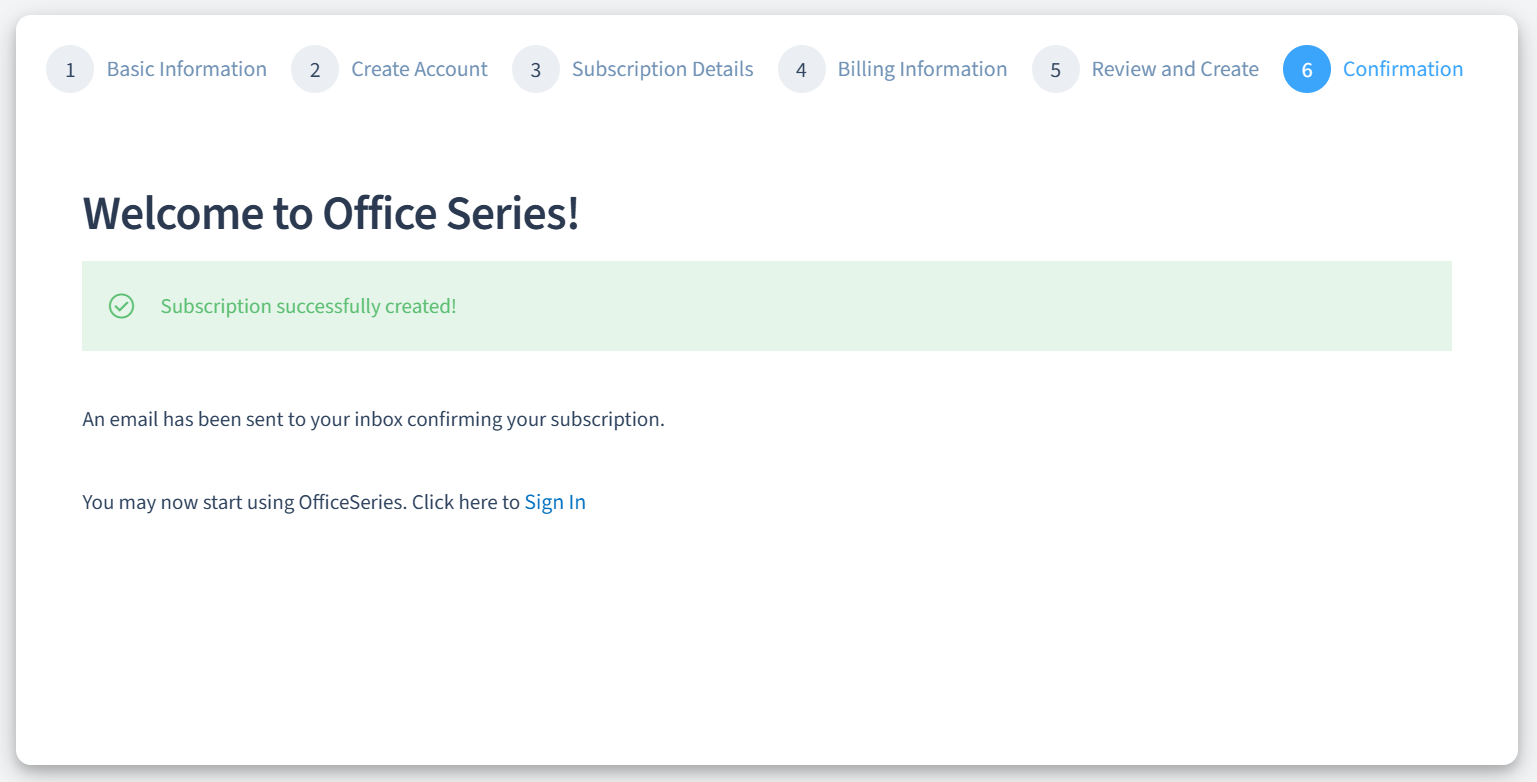
- You will also receive a confirmation email from OfficeSeries with details of your subscription and account information.
- You can now sign in to your account and start exploring the features and benefits of OfficeSeries. For detailed instructions, you can check out the Sign In Guide.
You have successfully signed up for OfficeSeries. Enjoy your productivity boost!
Security Tips
- Email Verification: Always ensure your email is correctly entered to receive all necessary account information.
- Secure Payment: Verify the website's security (look for HTTPS in the URL) before entering payment details.
Troubleshooting
Encountering issues during the sign-up process can be frustrating. Here are some common problems and their solutions to help you smoothly complete your OfficeSeries sign-up.
I didn't receive the validation email
- Check your spam or junk folder: Emails can sometimes be sent to the spam or junk folder due to various reasons, such as the email provider's filtering rules, the email content, among others.
- Verify your email address: Ensure that the email address entered during sign-up is correct. A small typo can prevent the email from reaching you.
- Resend the validation email: If you still can't find the email, try resending it. There should be an option to resend the validation code on the sign-up page.
The sign-up page is not loading properly
- Clear your browser cache and cookies: Sometimes, your browser's cache can cause the page to load incorrectly. Clearing your cache and cookies can resolve this issue.
- Try a different browser or device: If clearing the cache doesn't help, try accessing the sign-up page from a different browser or device.
If you encounter any other issues not covered here, please don't hesitate to contact our support team for further assistance.
Contact Information
For assistance during the sign-up process or any other inquiries, please reach out to the OfficeSeries support team:
- Email: support@generalblue.com
- Phone: +1 888-411-2583 (BLUE), Monday to Friday, 9:00 AM to 5:00 PM, Pacific Time
- Support Portal: OfficeSeries Support